Building with Twitter (Authentication)
King Somto
24 Mar 2022
•
5 min read

Introduction
With the large growth in Twitter users over the last decade high chance that most users joining your application have Twitter accounts, adding Twitter authentication to your site comes not only with the added feature of using Twitter Apis to make some very cool applications but also letting users quickly Sign-in or signup into your application without going through the stressful signup process and filling in forms, this gives users the snappiness of creating accounts with one click and helps convert users.
What’s the Twitter API
The Twitter API is a library of exposed endpoints that are used to interact with Twitter and build amazing products around its infrastructure, these APIs allow programmers to engage with the system and perform tasks like
- Listen to tweets
- Reply Tweets
- Delete tweets
- Like tweets
- Reply to messages
- Hide tweet replies
- And a bunch more things
The mechanism would be to store users authentication keys gotten from the Twitter sign-in process on the database and use that information to query the Twitter APIs to get or update data
Setting up our Twitter developer account
To be able to access twitter developer APIs we must first create an actual Twitter account, this automatically lets us access the Twitter developers’ pages https://developer.twitter.com/en, from here we can access numerous resources and tutorials on tools given to us by Twitter.
Create an app
Once your Twitter developer account is created we can create our Twitter application, go to https://developer.twitter.com/en/portal/projects-and-apps and create your application by clicking on the Add App call to action button to start the process of creating a new application and filling out the required information like app name, description of the application and what’s the app for.
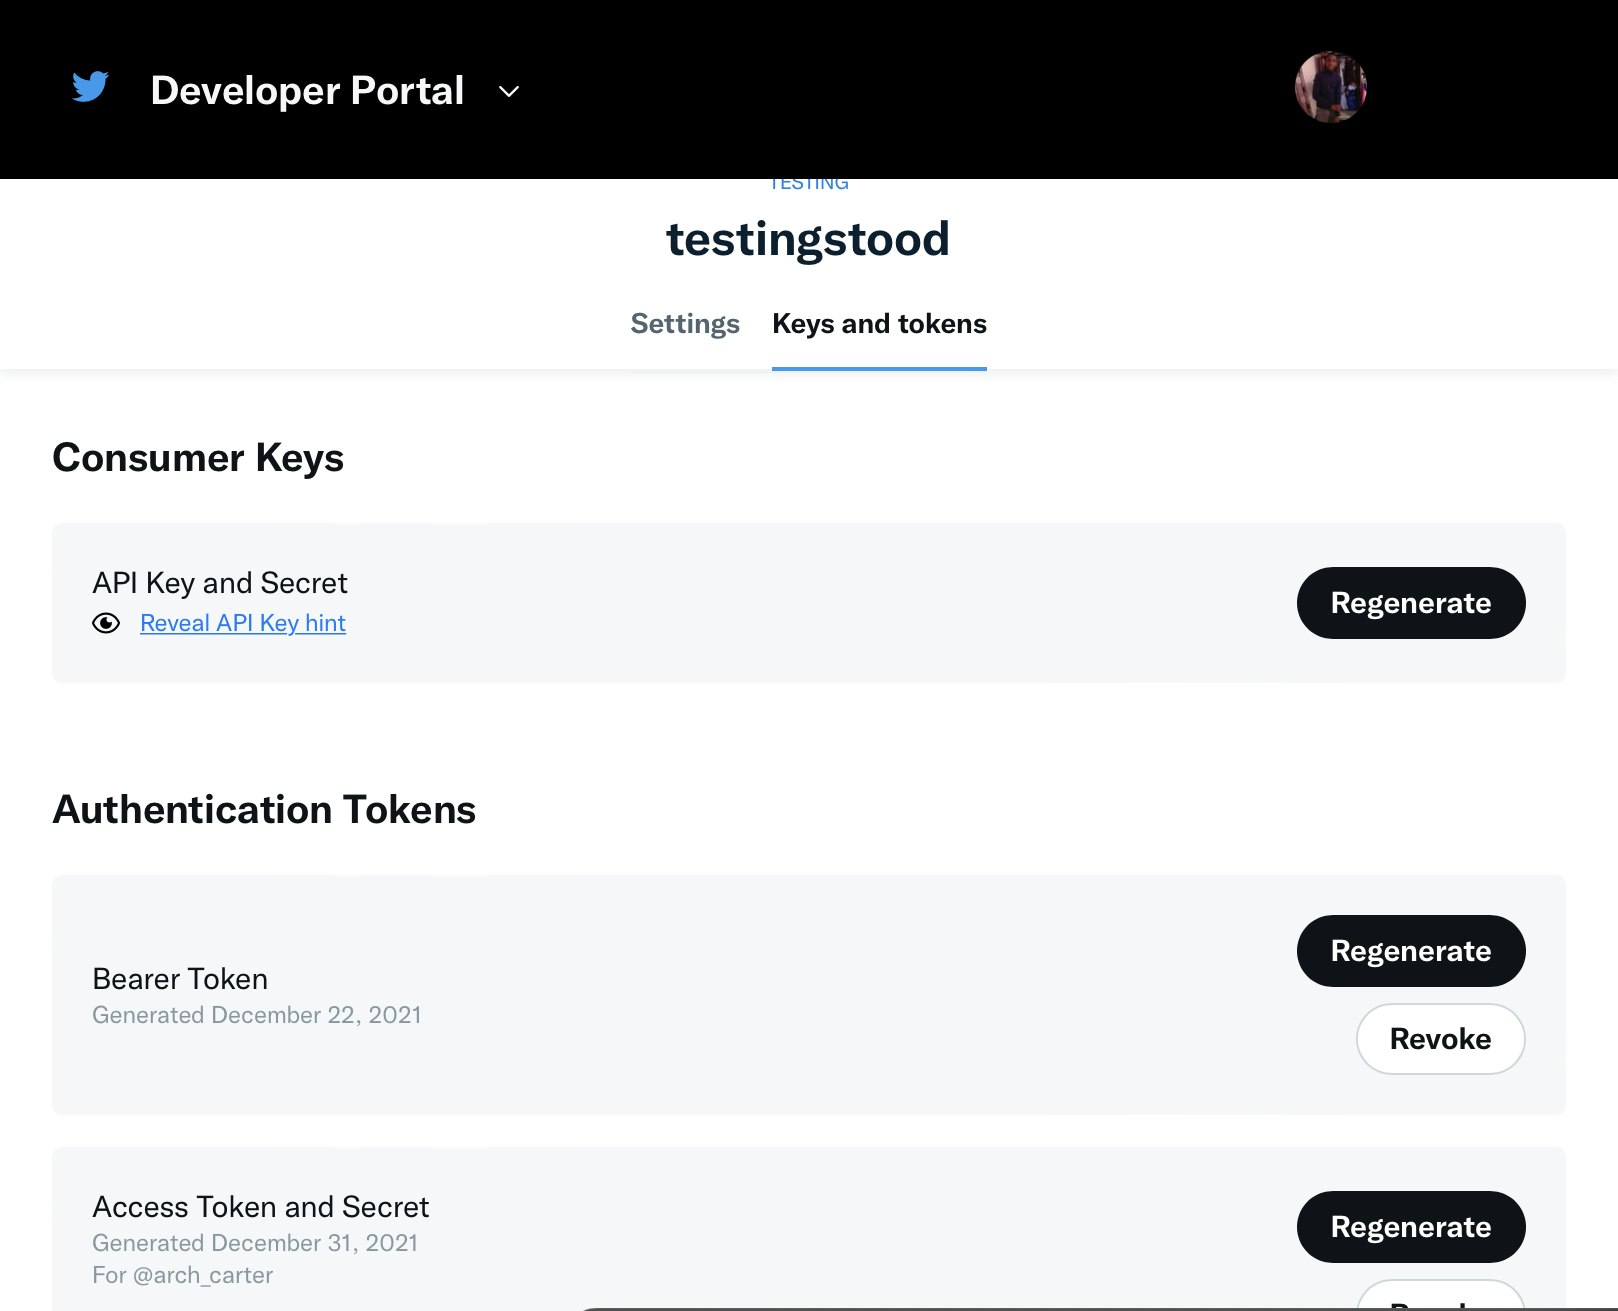
Getting the application keys
The application keys are a set of credentials used by us the developers to access the Twitter APIs, it includes the API key and API secret also the bearer token.
The Log in process
The login process is a 3 step process to get the keys.
- Create a request for the application to obtain the request token
- Authenticate the user application with the request token by the Twitter user
- Convert the request token into a user access token that we can use to access our APIs.
Setup
Setting up our project. We would need to create a node.js application so we can have access to the Twitter API by calling routes.
npm start -y
This creates our application
touch index.js
This creates our entry file
Our next step would be to install what we need to make this project run which is
- Express
- OAuth
npm i expres oauth
Helper functions
We need to create helper functions to let us access the Twitter APIs using Oauth, create a file callers utils.js file, and paste.
import oauth from 'oauth';

const oauthCallback = process.env.FRONTEND_URL;
const CONSUMER_KEY = process.env.CONSUMER_KEY;
const CONSUMER_SECRET = process.env.CONSUMER_SECRET;
const _oauth = new oauth.OAuth(
  'https://api.twitter.com/oauth/request_token',
  'https://api.twitter.com/oauth/access_token',
  CONSUMER_KEY, // consumer key
  CONSUMER_SECRET, // consumer secret
  '1.0',
  oauthCallback,
  'HMAC-SHA1',
);

export const getOAuthRequestToken = () => {
  return new Promise((resolve, reject) => {
    _oauth.getOAuthRequestToken((error, oauth_token, oauth_token_secret, results) => {
      if (error) {
        reject(error);
      } else {
        console.log({ oauth_token, oauth_token_secret, results });
        resolve({ oauth_token, oauth_token_secret, results });
      }
    });
  });
};
The code above creates an Oauth instance that lets the user generate a requestToken
export const getOAuthAccessToken = async (

)=> {
  ///
  return new Promise((resolve, reject) => {
    _oauth.getOAuthAccessToken(oauth_token, oauth_token_secret, oauth_verifier, (error, oauth_access_token, oauth_access_token_secret, results) => {
      if (error) {
        reject(error);
      } else {
        resolve({ oauth_access_token, oauth_access_token_secret, results });
      }
    });
  });
};
The code above helps us sign in users and return the oauth_access_token and our oauth_access_token_secret after passing in the oauth_token,oauth_token_secret and oauth_verifier.
Next would be to create the server in our index.js
const express = require('express')
const app = express()

app.get('/', function (req, res) {
  res.send('Hello World')
})

app.listen(3000)
Here we set up our application server and expose our port to 3000.
Step 1
Now that our helper functions are made let's create an API to generate our initial request token.
app.get('/request', async function  (req, res) {

     try {
      const {
        oauth_token,
        oauth_token_secret
      }  = await getOAuthRequestToken();

      res.cookie(COOKIE_NAME, oauth_token, {
        maxAge: 15 * 60 * 1000, // 15 minutes
        secure: true,
        httpOnly: true,
        sameSite: true,
      });

      tokens[oauth_token] = { oauth_token_secret };

      res.json({
        success:true,
        oauth_token
    })
    } catch (error) {
      console.log(error);
      res.status(400).json({
          success:false
      })
    }
  })
Going to http://localhost:3000/request calls the token request API and returns our Oauth token which we need for our second step.
Step 2
Step 2 involves us Authenticating the user with our request token to ask the user for permission to access their Twitter account, that can be done by using this URL template
`https://api.twitter.com/oauth/authenticate?oauth_token=${oauth_token}`;
This opens up Twitter and lets the user sign into their account to grant the application permission to the user profile by opening the Twitter Sign-In page, which after login opens a callback route, the callback route contains the oauth_token and the oauth_verifier, this is later passed to the backend to be verified.
http://127.0.0.1:3000/validate?oauth_token=7M69bwAAAAABW7h5AAABfdKogs4&oauth_verifier=Ep8ciCzrPYoG3RiWI74ZEUkn6RAPPl0h
Step 3
At this step, we validate the oauth_token and the oauth_verifier passed to us by Twitter with our route, lets first create that route.
app.post('/validate', async function (req, res) {

    try {
        ///i need to store user access token in db annd set up profile
        ///get data from the request
        const { oauth_token, oauth_verifier } = req.body;
        ///need to get stored secreet token
        const oauth_token_secret = tokens[oauth_token];
        if (!oauth_token_secret) {
            throw new Error('Can not authenticate user try again');
        }

        const {
            oauth_access_token, oauth_access_token_secret
        } = await getOAuthAccessToken(oauth_token, oauth_token_secret, oauth_verifier);

        res.json({
            success: true,
            oauth_token
        })
    } catch (error) {
        console.log(error);
        res.status(400).json({
            success: false
        })
    }
})
Here our route takes in the oauth_token and the oauth_verifier and passes it to the Oauth API which helps us to validate our request and generates a set of oauth_access_token, oauth_access_token_secret, this data can now be used to access user data from Twitter.
Accessing user data
To access Twitter user data we have to make use of https://api.twitter.com/1.1/account/verify_credentials.json API to get user data, but we don't really need to call it directly we can make use of Oauth to interface with it because Oauth contains the authentication.
So move into our util.js file and add.
exports.getProtectedResource = async (

)  => {
  ///
  return new Promise((resolve, reject) => {
    _oauth.getProtectedResource(url, method, oauth_access_token, oauth_access_token_secret, (error, data, response) => {
      if (error) {
        reject(error);
      } else {
        resolve({ data, response });
      }
    });
  });
};
Now let's edit the route and call our endpoint.
app.post('/validate', async function (req, res) {

    try {
        ///i need to store user access token in db annd set up profile
        ///get data from the request
        const { oauth_token, oauth_verifier } = req.body;
        ///need to get stored secreet token
        const oauth_token_secret = tokens[oauth_token];
        if (!oauth_token_secret) {
            throw new Error('Can not authenticate user try again');
        }

        const {
            oauth_access_token, oauth_access_token_secret
        } = await getOAuthAccessToken(oauth_token, oauth_token_secret, oauth_verifier);

				const { data } = await getProtectedResource(
				      'https://api.twitter.com/1.1/account/verify_credentials.json',
				      oauth_access_token_secret,
				      oauth_access_token,
				      'GET',
				    );

		    ////extract user data to save
		    const {
		      profile_background_color = '',
		      profile_background_image_url = '',
		      profile_image_url_https = '',
		      profile_sidebar_border_color = '',
		      profile_text_color = '',
		      id_str,
		      screen_name
		    } = JSON.parse(data);

        res.json({
            success: true,
            data:{
		      profile_background_color = '',
		      profile_background_image_url = '',
		      profile_image_url_https = '',
		      profile_sidebar_border_color = '',
		      profile_text_color = '',
		      id_str,
		      screen_name
		    }
        })
    } catch (error) {
        console.log(error);
        res.status(400).json({
            success: false
        })
    }
})
Conclusion
We have been able to go through the process of signing a user up with Twitter and avoiding the long process of asking them to fill in user details which is usually a hassle and can reduce conversion, we went through the steps involved in the process of signing up a user and what that process returns which is our token and secret key, which we later used to get user details.
Next steps or tutorials would involve performing tasks like liking posts or posting them at defined times.

WorksHub
Jobs
Locations
Articles
Ground Floor, Verse Building, 18 Brunswick Place, London, N1 6DZ
108 E 16th Street, New York, NY 10003
Subscribe to our newsletter
Join over 111,000 others and get access to exclusive content, job opportunities and more!