React Hooks in Action: Building a Todo App (Hint: No Classes)
Shuvo Habib
28 Nov 2018
•
6 min read

#What are the Hooks in React? As React Doc says, Hooks are a new feature proposal that lets you use state and other React features without writing a class. It’s currently in React v16.7.0. After knowing a bit of react hooks motivation, we’ll be jumping on building an App with React Hooks.
- -# Motivation: The React Hooks intro gives a good section on this: Classes confuse both people and machines. The gist is classes can sometimes be confusing and can be written any number of ways. That’s when hooks come into the play. Let’s jump into the code, you’ll definitely love it.
-
-# What are we building? We’ll be building a Todo app step by step using React Hooks. As I promised, there will be no classes in this app. The reason, I choose to build a todo app as it covers all 4 aspects of CRUD; Create, Read, Update, Delete. I’m sharing the github repo link as, you can follow the instruction along with the complete code and know the map, where it’s going.
Step 1 — Installation of the dependencies
The first step covers the installation process of React JS for implementing hooks. As hooks are still in the alpha version it’s not connected with ‘create-react-app’ We need to install it manually.
yarn add react@16.7.0-alpha.2 react-dom@16.7.0-alpha.2
Step 2 — Styling the app to make it less boring!
I added a bit of styling for this app, so that it does not look that boring. CSS code will be in src/App.css file.
Styling won’t be the focus of this app, so we’ll keep this short and sweet.
##src/App.css
*{
    outline:none;
}
.app {
    padding: 30px;
    height: 100vh;
}

button {
    padding: 10px;
    border-radius: 4px;
    margin-left: 10px;
    font-size: 15px;
    background: cadetblue;
    color: white;
}

.todo-list {
    border-radius: 4px;
    max-width: 500px;
    margin: 0 auto;
    border: 1px solid# e3e3e3;
    padding: 15px 10px 30px;
}

.todo {
    background:# fff;
    padding: 20px 10px;
    font-size: 12px;
    margin-bottom: 6px;
    border-radius: 3px;
    display: flex;
    align-items: center;
    justify-content: space-between;
    border-bottom: 1px solid# e2e2e2;
}

form input {
    width: 100%;
    padding: 20px 0px;
    border-radius: 50px;
    border: 1px solid# e3e3e3;
    text-indent: 23px;
}
Step 3 — Understanding states in React Hooks
File: src/App.js
Let’s start by importing a hook from React.
import React, { useState } from "react";
Here, useState is a Hook. We call it inside a function component to add some local state to it. It gives us two variables and we can name our two variables whatever we want.
-
1 . The first variable is the value. Similar to
this.state2 . The second variable is a function to update that value. Similar to
this.setState
The final part to useState is the argument that we pass to it. The only argument to useState is the initial state. In our case, we’re not using it now. In our example we’re passing the initial state as text and isCompleted . We will update this in a moment.
function App() {
   const [todos, setTodos] = useState([
      {
         text: "React Hooks in Depth",
         isCompleted: false
      },
      {
         text: "Write Articles @ Medium",
         isCompleted: false
      },
      {
         text: "Share article at Reddit",
         isCompleted: false
      }
   ]);
}
We’ll map our initial state inside our App function so that we can read it and update its state and delete later if needed. To do this we need to create a Todo component . Well, let’s make it first.
File: src/components/Todo.js
const Todo = ({ todo }) => <div className="todo">{todo.text}</div>;
We’’ll passing todo props to Todo component.
File: src/App.js
return (
    <div className="app">
      <div className="todo-list">
        {todos.map((todo, index) => (
          <Todo
            key={index}
            index={index}
            todo={todo}
          />
        ))}
      </div>
    </div>
  );
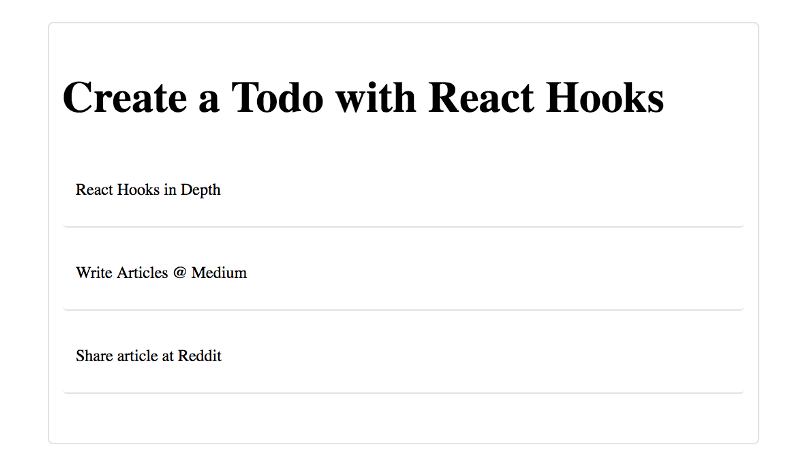
At this point of our code our app looks like this.
To create new Todos we definitely need an input form to create the todo list. Let’s create a new component TodoForm.
File: src/components/TodoForm.js
function TodoForm({ addTodo }) {
   const [value, setValue] = useState("");

   const handleSubmit = e => {
      e.preventDefault();
      if (!value) return;
      addTodo(value);
      setValue("");
   };

   return (
      <form onSubmit={handleSubmit}>
         <input
            type="text"
            className="input"
            value={value}
            onChange={e => setValue(e.target.value)}
            placeholder=" Enter your task"
         />
      </form>
   );
}
Let’s breakdown the code above.
We’ll be resetting our state after submitting the input form.
const [value, setValue] = useState("");
And, thehandleSubmit variable that can handle our addTodo function (we will make that function soon) and add the item to the list.
File: src/App.js
const addTodo = text => {
   const newTodos = [...todos, { text }];
   setTodos(newTodos);
};
The three dots actually spread operator before the todos, is essentially "copying" the list for us so that we are able to add on the new to-do item. Then using our keyword that we set earlier, we will set the state with setTodos.
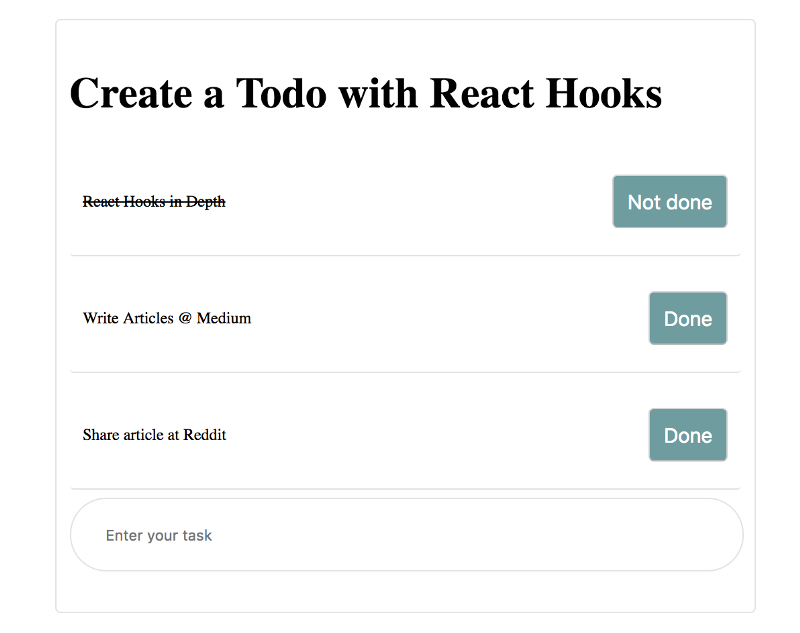
Now, we’d like to update the flag “isCompleted” flag that is initially set to false. And depending on the changes of “isCompleted” we’ll update the dom by doing “line through” the list respectively. By using completeTodo in the Todo function, we are going to be able to fire off that functionality. When the “Done” button is clicked, it will add in the textDecoration styling and cross-out the item and make the button “Not done”. The opposite will happen, if you click the “Not done ” button.
File: src/App.js
const completeTodo = index => {
   const newTodos = [...todos];
   newTodos[index].isCompleted = !newTodos[index].isCompleted;
   setTodos(newTodos);
};
File: src/components/Todo.js
function Todo({ todo, index, completeTodo}) {
   return (
      <div
         className="todo"
         style={{ textDecoration: todo.isCompleted ? "line-through" : "" }}
      >
         {todo.text}

         <div>
            <button onClick={() => completeTodo(index)}>{todo.isCompleted ? "Not done" : "Done"}</button>
         </div>
      </div>
   );
}
Diving down to the return of the App component and we’ll add in the following line:
completeTodo={completeTodo}
in the App component to pass the props by Todo component.
File: src/App.js
<Todo
   key={index}
   index={index}
   todo={todo}
   completeTodo={completeTodo}
/>
Returning to the browser, our to-do app should look something like this when a “Done” or “Not done ”button is clicked.
Time for deleting todo items.
Need to add this removeTodo functionality in the App.js component and pass props through the Todo component as we did before for creating and updating todo items. In this removeTodo function, we will again be using the spread operator but once we grab that current list, we will be "splicing" the chosen index off of the array of items. Once that is removed, we will return the new state by setting it with setTodos to be newTodos.
File: src/App.js
const removeTodo = index => {
   const newTodos = [...todos];
   newTodos.splice(index, 1);
   setTodos(newTodos);
};
File: src/App.js
<Todo
   key={index}
   index={index}
   todo={todo}
   completeTodo={completeTodo}
   removeTodo={removeTodo}
/>
So finally, our Todo component will look like this
File: src/components/Todo.js
You’ll see as well that we are bringing in removeTodo and completeTodo at the top and then using it in the onClick of the “button”s below.
import React  from "react";

function Todo({ todo, index, completeTodo, removeTodo }) {
   return (
      <div
         className="todo"
         style={{ textDecoration: todo.isCompleted ? "line-through" : "" }}
      >
         {todo.text}

         <div>
            <button onClick={() => completeTodo(index)}>{todo.isCompleted ? "Not done" : "Done"}</button>
            <button onClick={() => removeTodo(index)}>x</button>
         </div>
      </div>
   );
}

export default Todo;
Step 4 — Wrapping up the app
File: src/App.js
Our app component looks like this in the final. We imported both Todo and TodoForm from the components folder and passed props accordingly.
import React, { useState } from "react";
import Todo from './components/Todo';
import TodoForm from './components/TodoForm';
import "./App.css";


function App() {
   const [todos, setTodos] = useState([
      {
         text: "React Hooks in Depth",
         isCompleted: false
      },
      {
         text: "Write Articles @ Medium",
         isCompleted: false
      },
      {
         text: "Share article at Reddit",
         isCompleted: false
      }
   ]);


   const addTodo = text => {
      const newTodos = [...todos, { text }];
      setTodos(newTodos);
   };

   const completeTodo = index => {
      const newTodos = [...todos];
      newTodos[index].isCompleted = !newTodos[index].isCompleted;
      setTodos(newTodos);
   };

   const removeTodo = index => {
      const newTodos = [...todos];
      newTodos.splice(index, 1);
      setTodos(newTodos);
   };

   return (
      <div className="app">
         <div className="todo-list">
            <h1 className="title">Create a Todo with React Hooks</h1>
            {todos.map((todo, index) => (
               <Todo
                  key={index}
                  index={index}
                  todo={todo}
                  completeTodo={completeTodo}
                  removeTodo={removeTodo}
               />
            ))}
            <TodoForm addTodo={addTodo} />
         </div>
      </div>
   );
}

export default App;

What have we learned?
Hooks don’t replace our knowledge of React concepts.
There are no plans to remove classes from React by the creators.
Crucially, Hooks work side-by-side with existing code so you can adopt them gradually.
Fully backwards compatible.
The motivations for the Hooks feature proposal are the following ones:
-
To reuse the Stateful components logic
Reducing complexity from components to make it easier to understand
Get rid of the phenomena “Classes confuse both people and machines”
I hope you found this tutorial fun and valuable. That’s it and if you found this article helpful, you can also follow me on Medium and Twitter, and if you have any doubt, feel free to message me on LinkedIn

WorksHub
Jobs
Locations
Articles
Ground Floor, Verse Building, 18 Brunswick Place, London, N1 6DZ
108 E 16th Street, New York, NY 10003
Subscribe to our newsletter
Join over 111,000 others and get access to exclusive content, job opportunities and more!